This post was revised on September 10, 2018 to incorporate the latest viewer release.
As with Squarespace that we have integrated recently, Weebly still lacks support for third-party plugins. So our approach to integrating with Weebly is very similar to Squarespace which also shares some similarity with the embed shortcodes in our WordPress and Joomla plugins (full list).
Weebly doesn't allow uploading folders with 360 product images to their hosting so a separate web hosting account is required. For example, you may use an existing website hosting you may already have outside of Weebly, setup an extra hosting account, or consider our optimized PixRiot service. We would be happy to upload your tests to our servers free of charge if you need to run any tests (just let us know).
Now lets review how to integrate your published views in Weebly.
1) For a quick youtube-style integration using iFrame, please refer to our user guide under Web Integration -> Embed via iFrame. If this works best for you, you may ignore the rest of the post.
2) Publish a 360 product view using WebRotate 360 SpotEditor that you can download here. Here's a quick video that walks you through the basic steps.
3) Upload the contents of the 360_assets folder that you will see in the published folder under your SpotEditor project directory (or wherever you have chosen to output your published 360 product view) to your web hosting. You can upload it right away on publish in SpotEditor using our built-in FTP option (check "Upload assets only") or use a popular FTP client such as FileZilla or a browser based file manager that comes with your web hosting.
4) Once uploaded, note the location of the xml file inside the uploaded folder (e.g http://my-domain.com/360-views/my-product/my-product.xml). You'll will need this URL for the next steps.
For a quick test, you can also use this URL of our example 360 product view:
https://cdn.webrotate360.com/examples/3.6/sampleshoe/config.xml5) Login to Weebly and navigate to Settings -> SEO
6) Paste the following lines under Footer Code and click Save.
<script src="https://cdn.webrotate360.com/lib/jquery/jquery.js"></script>
<script src="https://cdn.webrotate360.com/lib/imagerotator/latest/js/imagerotator.js"></script>
<link href="https://cdn.webrotate360.com/lib/imagerotator/latest/css/round.css" rel="stylesheet">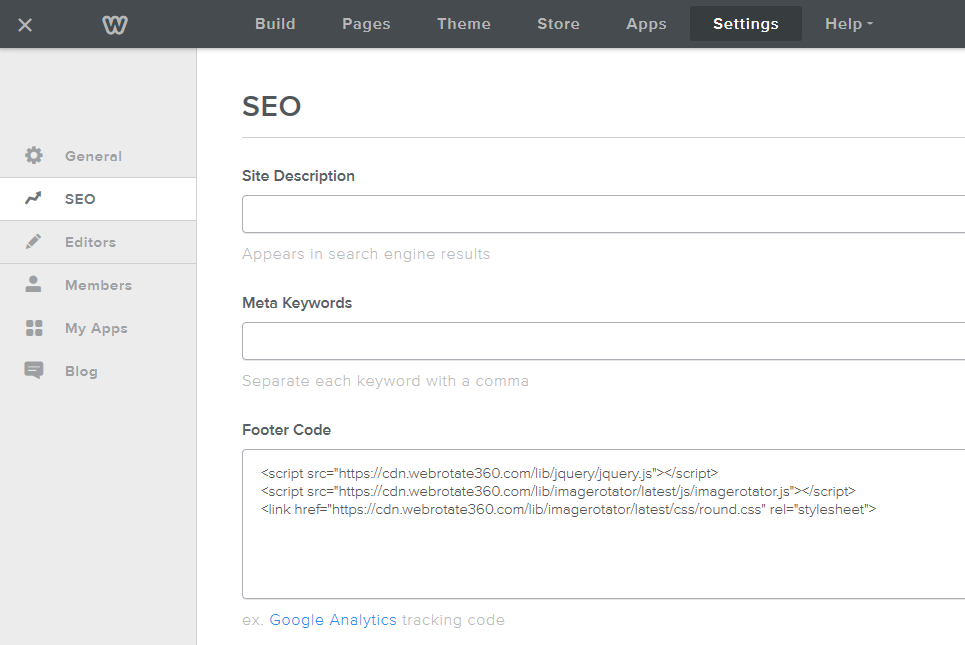
You may replace round.css with your WebRotate 360 viewer skin of choice (e.g, basic.css, thin.css, empty.css, retina.css, zoom_dark.css, zoom_light.css).
7) Close Settings and expand a Weebly page where you need to add your 360 product spin.
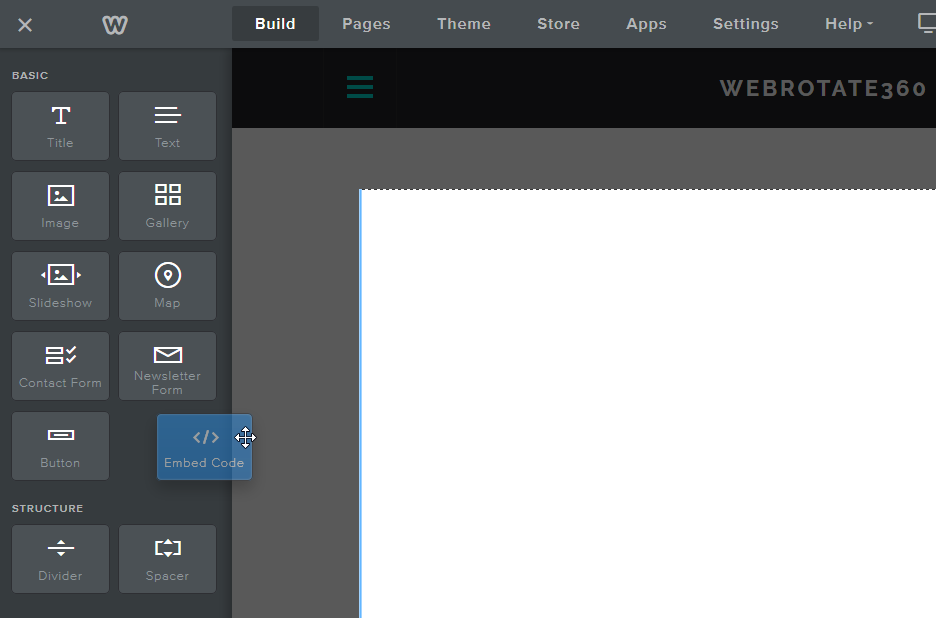
8) Select Build and drag the Embed Code widget onto your page as needed.
9) Click on the embed code widget that you have just placed on your page to enter the edit mode and paste the following snippet, replacing the URL next to "xmlfile" with the one your have uploaded in the previous step or the example URL we show in step 4. Change width and height values as needed.
<div class="wr360embed-cdl" style="width:100%;height:600px;"
data-imagerotator='{"xmlfile":"http://your-config-url.xml"}'></div>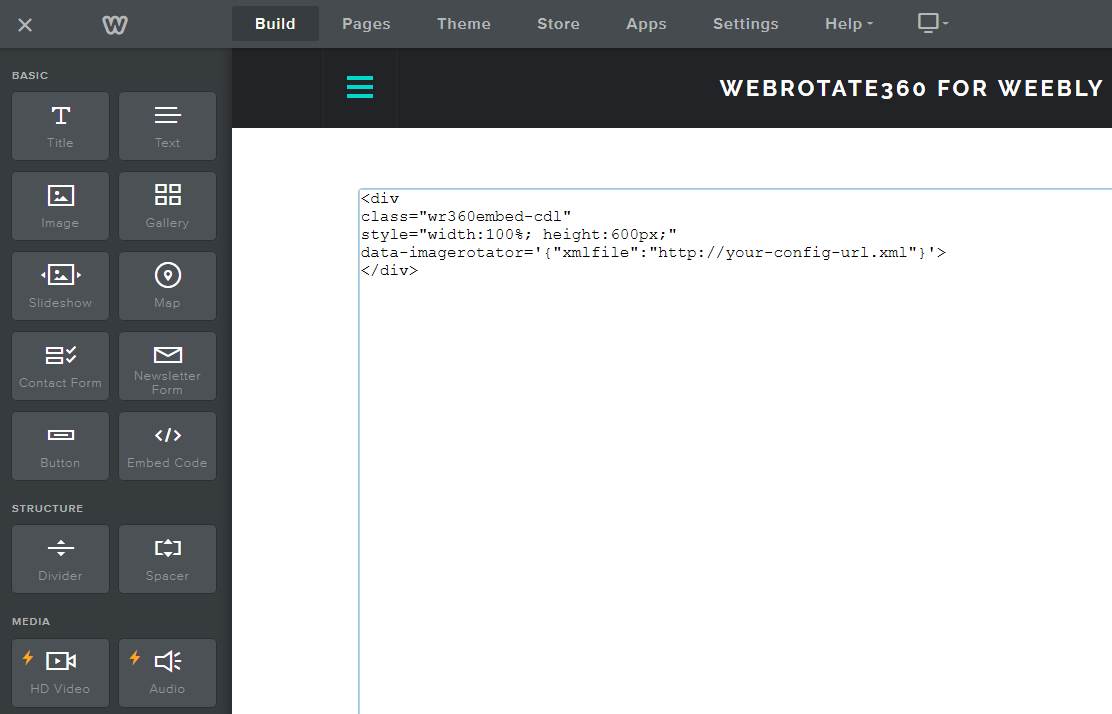
PS: there're few options that you can configure in the last step. Below is an example with all of the available options listed in one place:
<div class="wr360embed-cdl" style="width:100%;height:600px;" data-imagerotator='{
    "xmlfile":"http://your-config-url.xml",
    "graphics": "https://cdn.webrotate360.com/lib/imagerotator/graphics",
    "basewidth": 1024,
    "minheight": 400
    "events": true,
    "name": "my-view",
    "rootpath": "http://my-cdn-for-images.com/product1/",
    "onready": your-javascript-callback}'>
</div>
Here's more details on each option:
- basewidth - viewer width in pixel that you can set to allow the viewer window to scale not just horizontally, which works by default if a parent container has relative width, but vertically as well. It usually represents your default viewer width in the page layout before any responsive scaling is applied. When it's set, the height of the viewer is automatically scaled relative to the scaled width.
- minheight - if basewidth is specified, this setting represents the minimum viewer height in pixel. This can be helpful on small mobile screens where you may not want the viewer height to go beyond some fixed minimum.
- events - set it to true if your website has Google Analytics integrated and you would like to track user engagement with your 3D product views as per this recent article on our blog.
- name - if specified, this name will appear in your Google Analytics event tracking so you could sort out the events by each view.
- rootpath - if you host images on a CDN server or if you need to have a single xml config for all of your 360 views, you can configure the image location using this path. Please find more details in our user guide under API / rootPath.
- graphics - absolute path to a folder with hotspot indicator images (if you use hotspots!). Note that we share all default indicator images on our CDN, so this path will work: https://cdn.webrotate360.com/lib/imagerotator/graphics
- onready - pass your JavaScript API callback that accepts one parameter being the viewer API object. Please refer to our user guide under API / apiReadyCallback for more details about various API functions we currently support.